Install Arch Linux on MacBook in 2024

Intro
As a software developer, it’s quite common to work with Linux. Given the wide variety of Linux distributions, experiencing some of them can provide valuable hands-on experience. Arch Linux, one of the most popular distributions, has a solid reputation in the developer community. I want to explore more about it, and I have a MacBook 2015 that I can use to install it.
It looks like a plan, let’s go for it.
Before installation
Before we install Arch Linux on the MacBook, it’s better for us to upgrade the OS on mac to the latest version. It is recommended by the Arch Linux Wiki.
After we have done this, we can download the latest ISO image of Arch Linux and burn it into a U disk. The download page can be found here.
We can burn the image by using dd command on MacOS. An example of the command could be:
sudo dd if=/path/to/image.img of=/dev/sdX bs=4M status=progress
Replace the placeholders with the appropriate values:
/path/to/image.imgshould be the path to your image file./dev/sdXshould be the device name of your USB drive (e.g.,/dev/sdb). Be very careful to select the correct device name to avoid overwriting your hard drive.
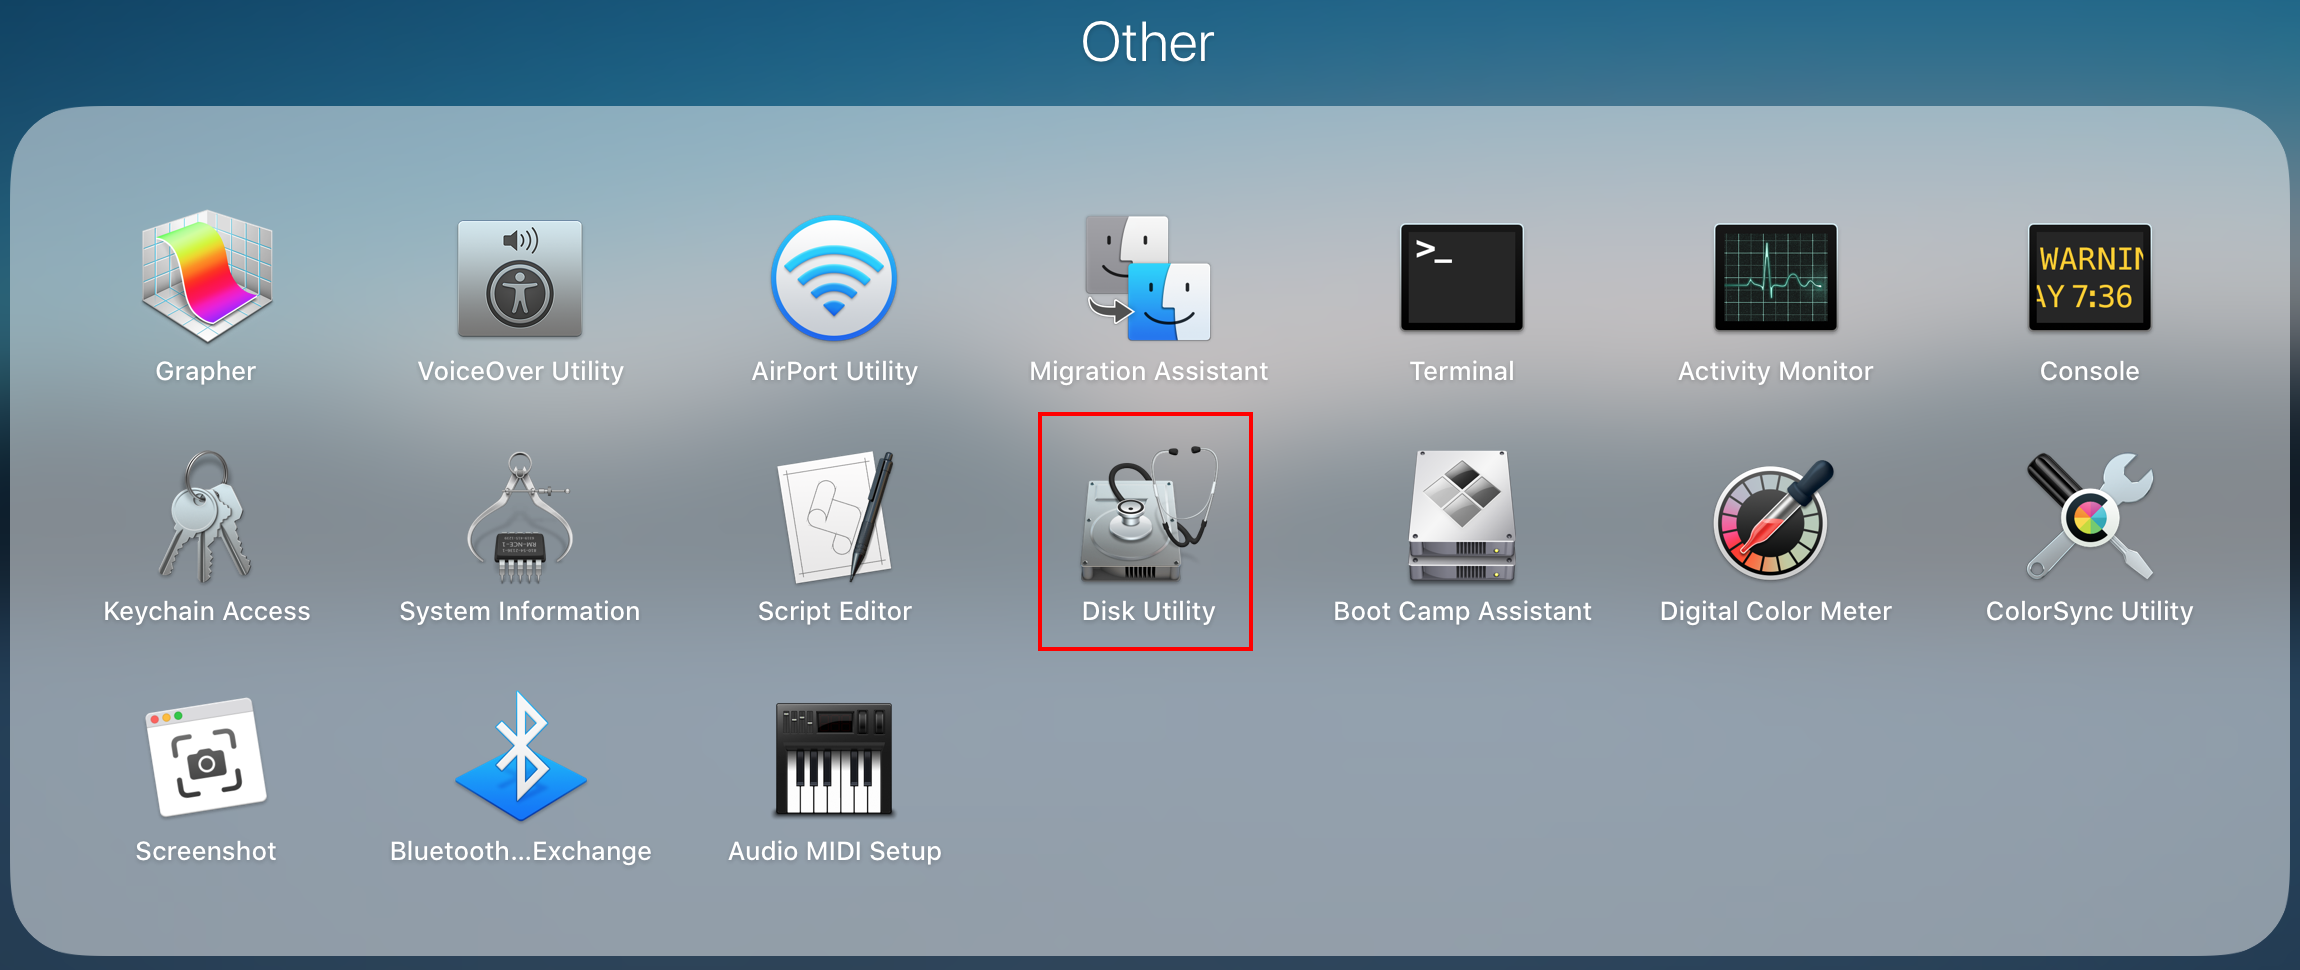
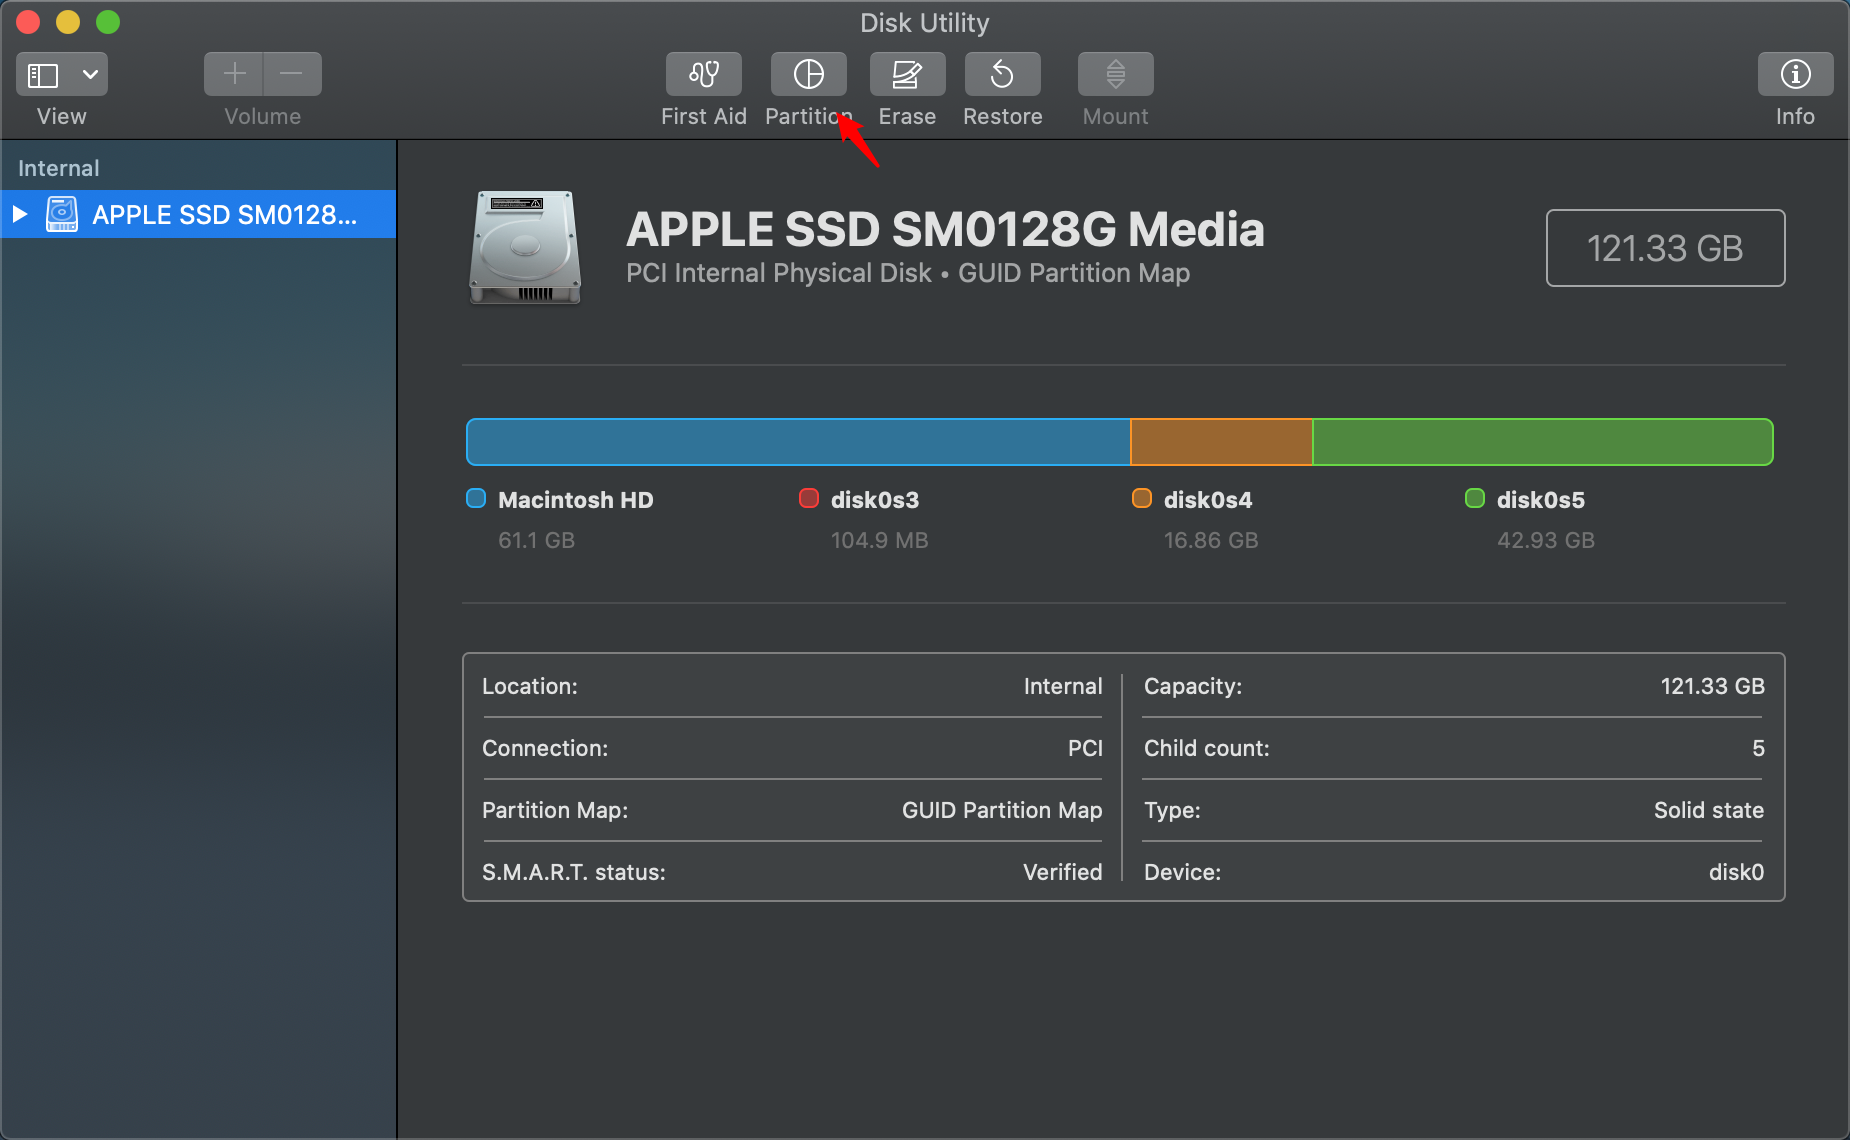
Once you’ve prepared the u disk, we need to prepare the installation partition on the mac. You may need to use the partition tool to have a dedication partition for Arch Linux, or you can skip this step if you don’t need MacOS anymore.
You can follow the steps as below:


Start Arch Live Environment
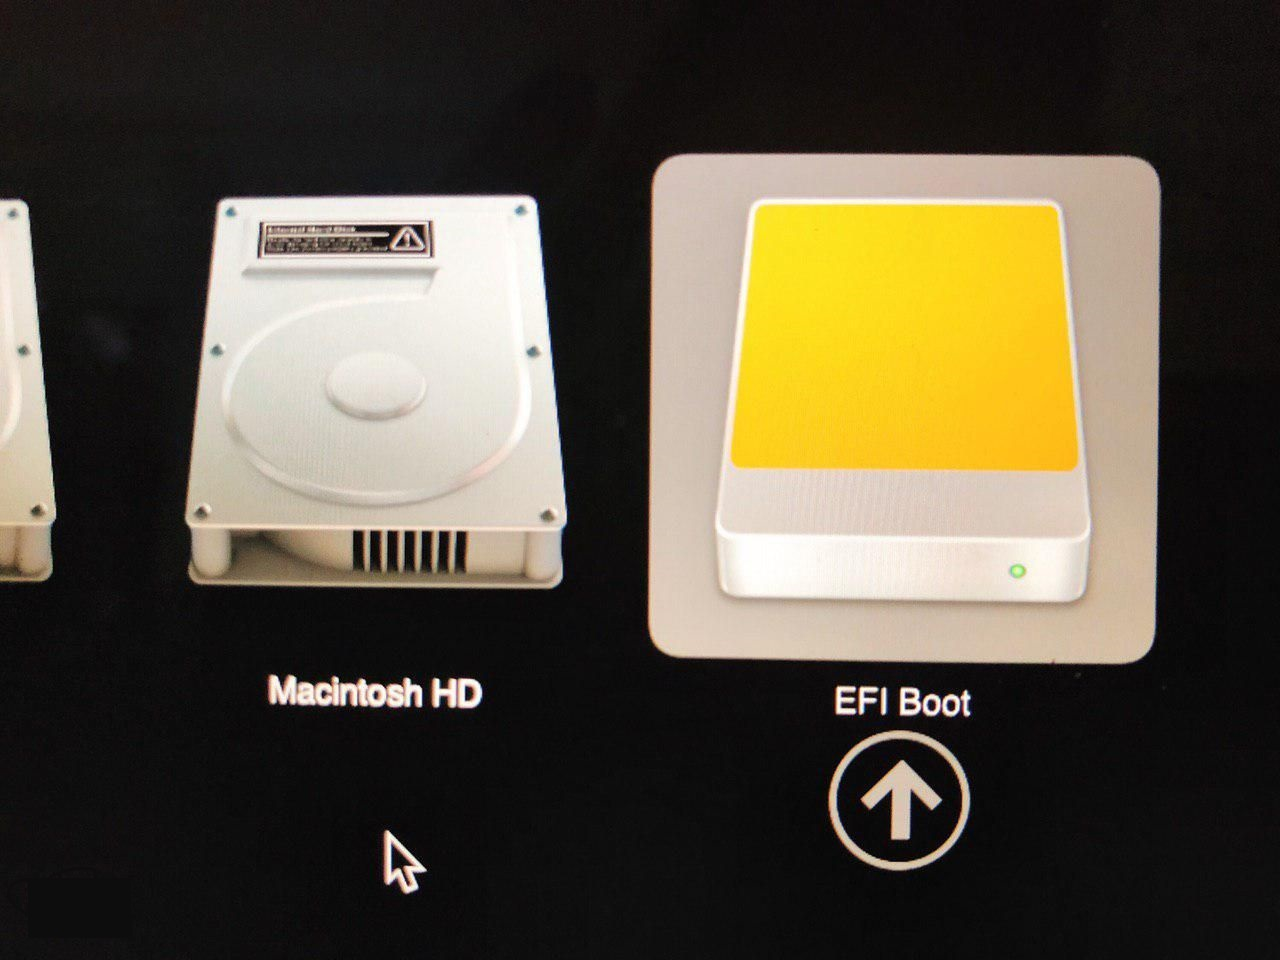
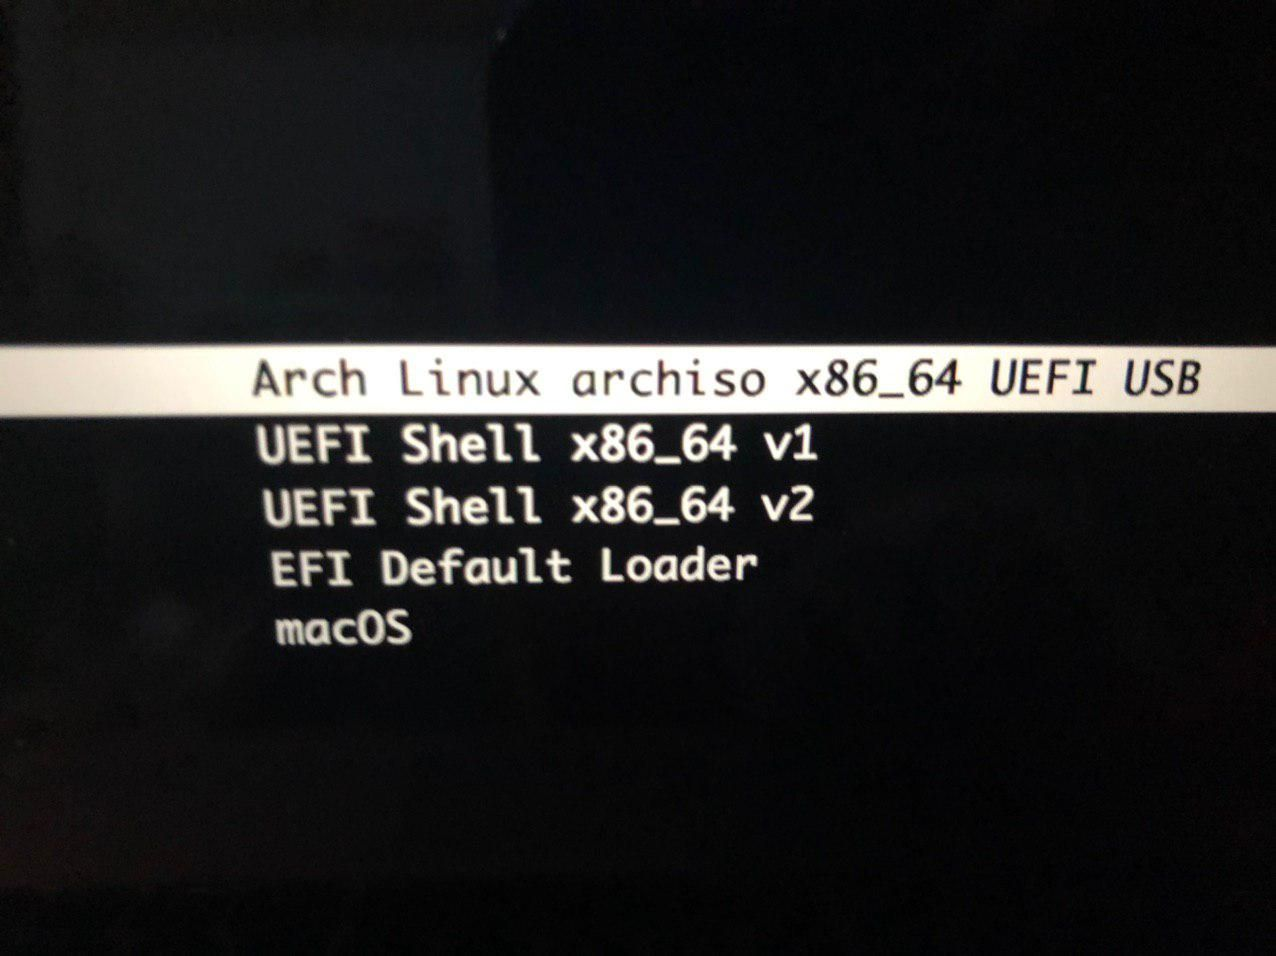
Next, you need to turn off your mac, plugin the u disk. When you turn on your mac, you need to hold the Option key. The mac will navigate into boot device selection interface. Choose EFI Boot and Arch Linux archiso x86_64 UEFI USB.


Wait for few seconds, we can get into the Arch live environment.
Connect to Wi-Fi network
To continue the installation, we need to connect to the network. We can use iwctl to do so:
$ iwctl

# First, if you do not know your wireless device name, list all Wi-Fi devices:
[iwd]# device list

# to initiate a scan for networks (note that this command will not output anything):
[iwd]# station name scan

# You can then list all available networks:
[iwd]# station name get-networks

# Finally, to connect to a network:
[iwd]# station name connect SSID
Create the partition
Next, we need to prepare the disk for the installation.
$ fdisk -l

Disk /dev/sda: 113 GiB, 121332826112 bytes, 236978176 sectors
Disk model: APPLE SSD SM0128
...
Devices             Start         End     Sectors    Size  Type
/dev/sda1              40      409639      409600    200M  EFI System
/dev/sda2          409640   119745575   119335936   56.9G  unknown
/dev/sda3       119745576   236978142   117232640   55.9G  <Type>
...
We can use cgdisk to manage the partition of the disk.
$ cgdisk /dev/sda
                              cgdisk 1.0.4

                          Disk Drive: /dev/sda
                       Size: 236978176, 113.0 GiB
Part.#     Size        Partition Type            Partition Name
---------------------------------------------------------------
   1       200.0 MiB   EFI System                EFI System Partition
   2       56.9 GiB    Apple APFS                Customer
   3       55.9 GiB    <Type>                    <Name>
We can delete the Part.3 and select New to create a new partition.
# Reserve 128M of space
First sector (xxxxxxx-xxxxxxxx, default = xxxxxxxx): +128M<Enter>

# Boot partition size
Size in sectors or {KMGTP} (default = xxxxxxxx): 100M<Enter>

# Partition ID, keep the default
Hex code or GUID (L to show codes, Enter = xxxx): <Enter>

# Partition name
Enter new partition name, or <Enter> to use the current name: boot<Enter>
We select free space and create root and home partition.
# create root partition,around 15-20GiB
First sector (xxxxxxx-xxxxxxxx, default = xxxxxxxx): <Enter>
Size in sectors or {KMGTP} (default = xxxxxxxx): 15G<Enter>
Hex code or GUID (L to show codes, Enter = xxxx): <Enter>
Enter new partition name, or <Enter> to use the current name:
root<Enter>

# create home partition,the size is the remaining space
First sector (xxxxxxx-xxxxxxxx, default = xxxxxxxx): <Enter>
Size in sectors or {KMGTP} (default = xxxxxxxx): <Enter>
Hex code or GUID (L to show codes, Enter = xxxx): <Enter>
Enter new partition name, or <Enter> to use the current name:
home<Enter>
We can refer to the ArchWiki: Mac#Arch_Linux_with_OS_X_or_other_operating_systems
Format and mount
Format the partitions:
$ mkfs.vfat /dev/<boot partition>
$ mkfs.ext4 /dev/<root partition>
$ mkfs.ext4 /dev/<home partition>
Next, we can mount the partitions:
$ mount /dev/<root partition> /mnt
$ mkdir /mnt/home
$ mount /dev/<home partition> /mnt/home
# Mount the EFI partition to /mnt/boot. Note that it is the EFI partition (sda1) being mounted, not the boot partition (sda3).
$ mkdir /mnt/boot
$ mount -t vfat /dev/<EFI partition> /mnt/boot
Installation
Install Base and Linux
Now, we can start to install the OS to the disk. First of all, we need to install the base software and Linux.
$ pacstrap -i /mnt/ base linux linux-firmware
After this step, the fstab file is generated, we can check it as this:
$ genfstab -U /mnt >> /mnt/etc/fstab
# we need to check the fstab file and record the root partition UUID
$ cat /mnt/etc/fstab
If it’s OK for genfstab, we can install software in the new OS:
$ arch-chroot /mnt

root@archiso /]#
Install essential software
Now, all our operations will be performed within the newly installed file system. The first step is to install the relevant software, listed as follows:
- base-devel: A software group that includes compiling and linking tools.
- linux-headers: Header files and scripts for Linux kernel modules.
- intel-ucode: Intel Microcode. For more details, see here. If this package is not installed, an error “Failed to open file: intel-ucode.img” will occur during boot.
- vim (optional): A text editor (the vim mentioned above is in the Arch Live environment).
- tree (optional): Lists files in a directory, used later to verify the bootloader settings.
- man (optional): Used to view command documentation.
- linux-lts (optional): Long-term support Linux kernel.
- linux-lts-headers (optional): Header files for the long-term support Linux kernel.
pacman -S base-devel linux-headers intel-ucode vim tree man linux-lts linux-lts-headers
Configure the System
We can configure the system as follows:
$ ln -sf /usr/share/zoneinfo/Region/City /etc/localtime # Set the timezone
$ hwclock --systohc                   # Synchronize the hardware clock
$ vim /etc/locale.gen                 # Enable some locale settings; uncomment the ones you need
$ locale-gen                          # Generate locale settings
$ echo LANG=en_US.UTF-8 > /etc/locale.conf    # Set the LANG variable
$ echo FONT=ter-p28b >> /etc/vconsole.conf # If you have a Retina display, set a larger font size.
Create Users
We were using root user to do all the operations. However, we won’t use root user for daily tasks. So, we are going to create a user for daily use:
# Set a password for the root user
$ passwd
# Create a new user and add them to the appropriate groups. Adding the user to the wheel group grants them sudo privileges
$ useradd --create-home --groups wheel,audio,video,optical,storage --shell /bin/bash <username>
# Set a password for the new user
$ passwd <username>
# Ensure members of the wheel group can use the sudo command
$ visudo
# Uncomment the following line
%wheel ALL=(ALL) ALL
Create System Boot
There are some ways to create the system boot:
- Using the native Apple bootloader with systemd-boot (Recommended)
- Using the native Apple bootloader with GRUB
I have tried the first approach but failed. So, we choose the second way to create the system boot.
pacman -S refind-efi
refind-install
refind-install will automatically find the EFI partition and register itself as the default UEFI bootloader. After the installation, be sure to check /boot/refind_linux.conf. Ensure that the root value in the first entry of the configuration is set to the UUID of the disk where / is located (for me, this is /dev/sda3). Otherwise, you might encounter an error like this during reboot:
device '' not found. Skipping fsck.

# Normally, it should look something like this:
/dev/sda3: clean, 322/342432 files, 432/432432 blocks
Here is the /boot/refind_linux.conf file I got from the USB boot drive:
"Boot with standard options"  "archisobaseddir=arch archisolabel=ARCH_201904"
"Boot to single user mode"    "archisobaseddir=arch archisolabel=ARCH_201904 single"
"Boot with minimal options"   "ro root=UUID=xxxxxxxx-xxxx-xxxxxxxx-xxxxxxxx"
The last entry contains the UUID for /dev/sda3 (you can find this in /etc/fstab). Copy this UUID to the first line to ensure a perfect boot:
"Boot with standard options" "ro root=UUID=xxxxxxxx-xxxx-xxxxxxxx-xxxxxxxx"
When booting, you need to select which image to boot in rEFInd. You can set timeout: -1 in /boot/EFI/refind/refind.conf to boot the default option directly. The refind.conf file contains detailed instructions if needed.
Final
After all the steps above, we have successfully installed Arch Linux on a MacBook Pro. If you prefer a desktop environment, you can install KDE for it. I plan to write another article for this part.
 William Yu